Organic Cheetos, Wine Jelly, Sous Vide Salmon, and Other Geek Recipes
Published 7:00 am Tuesday, November 2, 2010


After 107 years, food is interesting again. In 1903, Georges Auguste Escoffier published a book called Le Guide Culinaire, still considered by many the definitive guide to French cooking. This book was tremendously powerful in moving the culinary world forward—it is the sole reason that the brunch cook at your favorite neighborhood spot knows how to make a hollandaise. In fact, many cooking schools still teach from Escoffier; his recipes and methods are as fundamental to cooks as the periodic table is to chemists. The 2,973 recipes included in the abridged English version cover everything from a roux to frozen custard, including 140 sauces, 46 omelets, 85 ice-cream “bombes,” 34 ways to prepare a beef fillet, and a whopping 22 foie gras recipes. It’s unsurprising, then, that cooking hasn’t changed much in the past century, particularly in home kitchens.
In the past few years, though, we’ve witnessed a huge swell in the prevalence of “molecular gastronomy”—or, more accurately, modernist cooking. This has been fueled by emerging techniques like spherification, gelification, and sous vide cooking. Contestants on Iron Chef, including Seattle’s own Holly Smith of Café Juanita, are showing off dishes that Escoffier wouldn’t have thought up in his wildest absinthe-induced dreams. Chef José Andrés, a Spanish native and Washington, D.C., resident, is teaching Anderson Cooper how to drink molecular cocktails on 60 Minutes, and even your local barista has started adding goddamned foam to your coffee to show off his modernist flair.
Until recently, these techniques and the ingredients they require have been limited to the upper echelon of restaurant kitchens, and only exposed on five-star plates. However, it’s time to empower the home cook! Some of this stuff is ridiculously easy, and by experimenting with new ingredients and methods, you can also learn to cook normal food better.
The dishes described below are meant to introduce you to some of the fundamental techniques of modernist cooking. That said, all these dishes rely on a high-quality, locally produced main ingredient. It’s important to remember that this stuff is food first and a chemistry project second. It doesn’t matter if you can make a salmon fillet levitate like a superconductor and shoot laser beams onto the ceiling—if it’s a crappy piece of fish, it’s not worth eating.
It’s also important to remember that nobody is suggesting that all food be gelified, powdered, spherified, or frozen. When used thoughtfully and with intention, the surprise shapes, textures, and presentations described below can add new dimensions to an old classic.
So roll your 20-sided die, crank up Thomas Dolby on the boom box, and put on your safety goggles—it’s time to start cooking like a geek!
Sous Vide Salmon Crostini (without a sous vide machine)
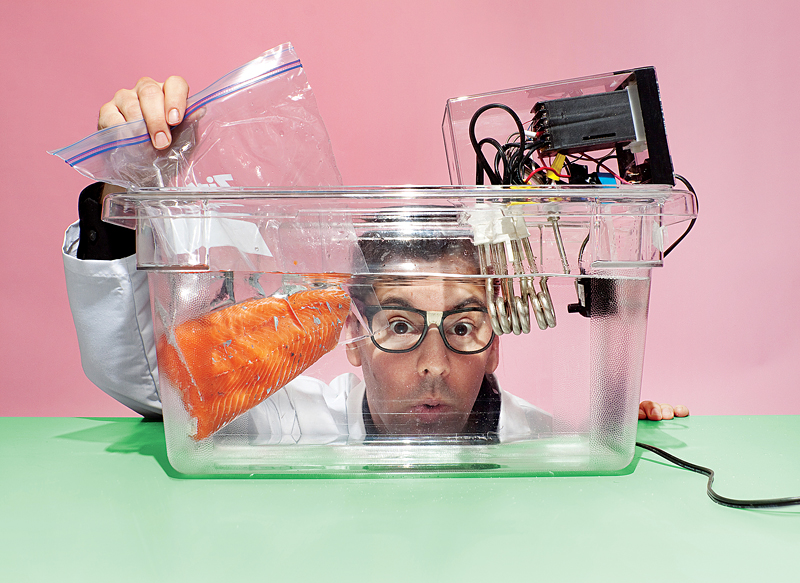
I’m crazy for sous vide. Every fillet, steak, chop, or tenderloin that I’ve cooked in the past six months has been vacuum-sealed and heated in a water bath until it was mouthwateringly tender. And when I installed a hot tub in my house, I secretly wondered if I could use it to sous vide a whole pig.
If you’re not familiar with sous vide cooking, you will be soon (all the kids are doing it). Here are the basics:
1. Vacuum-seal the food you want to cook in a plastic bag.
2. Fill a large basin with water.
3. Heat the water to a specific temperature, and hold that temperature exactly.
4. Add your bagged food.
5. Wait . . .
6. Remove food, sear (optionally) under the broiler, on a skillet or—my favorite—with a blowtorch.
7. Enjoy.
It’s really quite simple, but the complexities arise in steps 1 and 3. Vacuum sealers are expensive. So are sous vide heating-immersion circulators: the fancy devices that keep your water bath at a precise temperature. While a standard FoodSaver will run you a little over $100, the cheapest sous vide machine is $450, and a really good one is $700 or more. However, plenty of folks have come up with cheap solutions for getting started with sous vide without taking out a second mortgage. If you know how to wield a soldering iron, you can build a DIY circulator from some beverage heaters and a fancy thermostat for about $75.
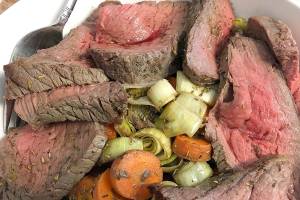
On the other end of the difficulty spectrum, I offer you the recipe below. It requires no special equipment, and it will let you experience one of the greatest wonders of sous vide cooking: medium-rare salmon. Salmon cooked slowly and to a proper medium-rare (49°C) has a remarkably delicate, buttery texture—a far cry from the tough, dry fish that cries goopy white tears when you bake it for half an hour.
This may also be a good time to talk about food safety. Salmon is full of bacteria that would like very much to kill you. The raw salmon you eat at your local sushi bar has been flash-frozen to kill all the tiny, evil microbes within. The salmon you buy at the grocery store—unless marked “sashimi grade”—has not. In order to make sure that our sous vide salmon is safe to eat, pasteurize it. Although that sounds complicated, it literally means keeping the fish above a certain temperature for some period of time—the longer you cook it, the lower that temperature can be. Luckily, that’s exactly how sous vide cooking works! In the case of a 1-inch-thick fillet, 20 minutes is way more than enough.
To be extra-safe, take a few additional precautions. To avoid a stomachache (at best) or death (at worst), don’t consume undercooked fish if you’re immune-compromised or pregnant. Also, purchase wild-caught salmon, and buy it from a good source, like a busy seafood department with no detectable fish smell. Any of the purveyors at Pike Place Market carry top-quality fish, as do specialty seafood shops like Mutual Fish.
As a rule of thumb, though, I don’t buy salmon anywhere that also sells Rockstar Energy Drinks. It’s an empirically derived rule, but it hasn’t steered me wrong yet.
Working time: 10 minutes
Total kitchen time: 30 minutes
Shopping list:
• 1.5 lbs. salmon fillet, about 1 thick, skin removed (ask your fishmonger to remove the skin for you—he’s better at it than you are)
• 1 tsp. salt
• 2 tsp. olive oil
• 1 gallon-size zip-top bag
• 1 loaf French bread
• 8 oz. mascarpone cheese
• 1/2 cup honey
• 1/2 cup microgreens (for example, pea tendrils)
1. Coat all sides of the salmon fillet with salt and olive oil. Place the fillet in a zip-top bag, seal, and set aside. If you happen to own a vacuum sealer, use it in place of the zip-top bag.
2. Fill a large stockpot with hot water from the tap. If your hot water is warmer than 50°C (122°F), adjust the temperature down to 50°C. If your hot water is cooler than 50°C, fill the pot, then heat the water on the stove, stirring frequently, until the temperature reaches 50°C. Remove from heat.
3. Place the salmon bag in the stockpot and open the zipper end to allow any trapped air in the bag to escape. If necessary, dunk the bag up to the zipper in the water and use your fingers to expel as much air as possible. Reseal the bag and cover the pot. Allow the salmon to cook for 20 minutes.
4. Meanwhile, slice and (optionally) toast the French bread. Smear each slice with a small amount of mascarpone.
5. Remove the salmon from the bag and pat dry with a paper towel. Slice the salmon into 1 cubes, removing any bones you encounter. Top each crostini (bread slice) with a cube of salmon. Then drizzle with honey and microgreens.
Minea Farms Blackberry Honey Antigriddle Lollipops
An antigriddle is what it sounds like: the opposite of a griddle. Rather than getting hot, it gets really, really cold: -30°F cold. Instead of cooking things, it freezes them. Sounds neat, doesn’t it? Good thing you can make one at home for about $5.
It turns out that dry ice is a great antigriddle substitute. It’s really cold (-109°F), it’s pretty cheap, and you can find it in the seafood department of most grocery stores. By placing a jelly-roll pan on top of a flat 5-lb. block of dry ice, we’ve got an antigriddle surface that’s adequately cold and will last for at least an hour of use.
If you’ve ever made caramels, you know that sugar exhibits some interesting properties as it heats. The temperature to which you heat it will determine whether the sugar turns hard and brittle or stays soft and pliable. The same behavior occurs at the other end of the temperature scale—slightly frozen honey is thick and gummy like caramel, while very cold honey becomes hard and brittle like those terrible candies your grandmother kept in a crystal bowl on her coffee table. But unlike heated sugar, these properties unravel as the honey warms in your mouth. The result: honey lollipops that start out firm but melt upon consumption.
If nothing else, this recipe is a great excuse to visit Minea Farms. This Woodinville roadside gem is actually best known for its fantastic apple ciders, but also carries a wide variety of honey products—honey straws, wax honeycomb, and, of course, little bear-shaped glass jars of honey. Among the flavors Minea offers, the blackberry honey stands out as especially complex and full-flavored, making it perfect for this concoction.
Working time: 10 minutes
Total kitchen time: 10 minutes
Shopping list:
• One 5-lb. block of dry ice (available at many grocery seafood counters; call ahead for availability)
• 1/2 cup Minea Farms Blackberry Honey
• 12 popsicle sticks or toothpicks
Note: When handling dry ice, be sure to wear thick gloves. Even very brief contact with the extreme cold can cause serious and permanent injury.
1. While wearing thick gloves, place the dry-ice block on a stable, level surface—for example, a folded kitchen towel on your countertop. Ensure that the flattest side of the dry-ice block is facing up.
2. Place a jelly-roll pan or smooth-bottomed cookie sheet directly on top of the dry-ice block, ensuring as much surface contact as possible.
3. Wait 5 minutes to allow the pan to cool. If the pan collects ice or frost, wipe it away before proceeding.
4. Working four at a time, arrange the popsicle sticks, leaving 2 of space between, on the coldest part of the pan. Drizzle about 1 tsp. (1 tbsp. for larger lollipops) of honey over the tip of the popsicle stick. Let the honey freeze for about 30 seconds, or until it releases easily from the pan. Flip each lollipop over and freeze another 30 seconds.
5. Serve immediately—the lollipops will hold their shape for about 1 minute.
Spherified DRY Lavender Soda Bellini
Spherification is one of the hallmark techniques of modernist cooking, made popular by El Bulli chef Ferran Adrià. At its core, spherification is the process of forming a membrane around a liquid so that it takes on the appearance and texture of caviar, olive-shaped balls, or noodles.
Achieving good spherification requires precision, patience, and practice. Unlike traditional cooking, where you can eyeball ingredients and make additions or substitutions and predict the outcome, the process of spherification is quite sensitive to the proportions of chemicals involved and to the acidity of the liquid you’re spherifying. For example, substituting alcohol for the DRY Soda in the recipe below will not lead to little pearls—it will lead to wasted alcohol and a big, fat frown. Don’t be discouraged, though; there are tons of spherification recipes online, and with a little practice, you’ll develop an intuition for creating your own.
For this recipe, the barely sweetened DRY lavender soda is a delightful surprise, as it bursts through the membrane of a caviar-like pearl on your tongue. And remembering the “food first” philosophy behind these techniques, it’s also worth appreciating that DRY Soda is made from all-natural ingredients. As you top each serving with prosecco, the tiny bubbles will hold on to the lavender spheres and make them dance in the glass.
Working time: 45 minutes
Total kitchen time: 45 minutes
Special equipment required: gram scale, immersion (aka stick, wand, hand) blender, turkey baster or other dropper, small fine-mesh strainer
Shopping list:
• 1 bottle DRY Lavender Soda
• 1.8g sodium alginate
• .5g sodium citrate
• 6.5g calcium chloride
• 1 liter + 1/2 liter filtered water (divided)
• 1 bottle prosecco
1. Pour the DRY Soda into a tall container that will fit your immersion blender. Carefully measure and add the sodium alginate and sodium citrate to the soda. Blend well until completely incorporated—the mixture should have a thick, snot-like consistency. Wash and dry your stick blender before proceeding.
2. In a large bowl, combine the calcium chloride and 1 liter of filtered water. Blend until the calcium chloride is completely dissolved.
3. Pour 1/2 liter of filtered water into a bowl—this will be used for rinsing the spheres after they have “baked” in the calcium chloride bath.
4. Suck a few tablespoons of the DRY Soda mixture into your turkey baster. Hold the baster about 2 over the calcium chloride bath and allow individual droplets to fall. As soon as they contact the bath, they’ll form little spheres. The spheres may be hard to see in your bowl since they’re transparent, but rest assured, they’re there. Add as many droplets as you can in 30 seconds. Wait an additional 30 seconds to let the spheres “cook”—the longer they are left in the calcium chloride bath, the firmer the balls will be, but your timing doesn’t need to be exact.
5. Scoop the balls from the bottom of the calcium chloride bath using a mesh strainer. Shake to remove as much excess water as possible, then rinse the balls by dipping them in the bowl of filtered water.
6. Repeat with the remaining DRY Soda mixture, or until you’ve run out of ball jokes to tell during the process. Set aside in a glass or plastic container until ready to serve. They can be made up to one day ahead of time, covered and stored in the refrigerator.
7. To serve, add a spoonful of the spheres to the bottom of a champagne flute. Present the drink by pouring the prosecco tableside and watching the spheres gently float in the glass.
All-Natural Beecher’s Flagship Cheetos
Being an enlightened eater is a fantastic lifestyle choice, but it invariably comes with a downside, such as occasional cravings for the kinds of factory-made, foil-bagged snacks that you certainly won’t find at Whole Foods. But eating a “Whole-ier than thou” diet doesn’t have to preclude enjoying the finest products of industrial food processing at home.
Food companies know that the secret formula for craveable snacks relies on three key variables: crunch, salt and cheese. There’s a reason why entire aisles of the grocery store are dedicated to this trifecta, and the Cheeto is a stunning example of what’s possible with a little science and engineering.
Cheetos are made in a three-stage process: extrusion, frying, and powder-coating. First, cornmeal is mixed into a batter and pumped at high pressure through an extrusion die into a chamber of heated air. The pressure and temperature cause the batter to “pop” into a fluffy treat. A quick dip in the fryer is followed by the crucial step of dusting the snacks with iridescent-orange powdered cheese. And let’s be honest: It’s the powdered cheese that keeps us coming back.
Luckily, you can approximate this process at home. A cookie press, the kind used for stamping out dozens of sugar cookies, is a good substitute for the extrusion machine, and allows you to quickly recreate the Cheeto’s signature shape. And the cheese powder? That’s the fun part.
Commercial food producers use a modified starch tapioca called maltodextrin to create the sticky, cheesy powder that leaves you with bright-orange fingers. This starch, sometimes sold under the brand name N-Zorbit, is also used by modernist chefs as an easy way to turn fats into powder. Although maltodextrin is available through online suppliers, it turns out that plain old tapioca is a pretty decent substitute. Tapioca is also a starch, and if you grind it into a powder, it exhibits a similar dehydrating behavior. Note, though, that you’re not looking for Jell-O tapioca mix—you’re looking for tapioca pearls. Many grocery stores even carry organic brands of tapioca pearls, and if you go now, you might be the first person in your neighborhood to cook an organic Cheeto!
Working time: 40 minutes
Total kitchen time: 40 minutes
Shopping list:
• 50g (1/4 cup + 2 tbsp.) small pearl tapioca
• 50g (1 loose cup) Beecher’s Flagship, grated
• 15g (1/2 tsp.) water
• 1/2 tsp. + 1 tsp. salt, separated
• 1 3/4 cup white corn meal
• 1/2 cup milk
• 2 egg whites
• canola oil, for frying
Special equipment: coffee grinder, food processor, cookie press with 1/2 circular die, pastry bag with 1/2 round tip, or cookie gun
For the powdered cheese:
1. Preheat your oven to 170°F, or its lowest setting above that.
2. Grind the tapioca pearls in a coffee grinder for 1 minute, or until they turn to a very fine powder. Set aside.
3. In a small saucepan, combine the water and grated cheese over medium heat, stirring constantly.
4. When the cheese is fully melted into a clump-free, runny sauce, transfer it to the bowl of your food processor. Add the powdered tapioca and blend on high until it forms thick granules, about 30 seconds. If your mixture doesn’t form granules, but forms a dough instead, add 1 tsp. additional tapioca and continue mixing.
5. Transfer the mixture to a nonstick or lined baking sheet and spread in a thin, even layer. Bake at 170°F for 45 minutes, or until the mixture is dry to the touch. Remove the baking sheet from the oven and allow the cheese powder to cool 10 minutes.
6. Add the cheese powder to the coffee grinder. Add 1/2 tsp. salt and grind 1 minute, or until it turns to a very fine powder.
For the Cheetos:
1. In a large bowl, combine the cornmeal, milk, egg whites, and 1 tsp. salt. Mix until combined and lump-free.
2. Add the cornmeal mixture to your cookie gun, and ensure that you can extrude it through the die. If the mixture is too dry, return it to the bowl and add 1 tbsp. milk. If the mixture is too wet to hold its shape, return it to the bowl and add 1 tbsp. of corn meal.
3. Add canola oil to a medium saucepan until it is about 2 deep. Heat to 350°F.
4. Line a baking sheet with paper towels. Spread the remaining powdered cheese on a second baking sheet.
5. Carefully squirt 4-6 pumps of the cornmeal mixture directly into the oil. Fry for 15 seconds, then flip and fry for an additional 15 seconds or until golden brown. Drain briefly on the paper towels, then toss immediately in the tray of cheese powder, rolling to coat. Transfer to a plate to cool. Repeat for remaining dough, ensuring that the oil temperature holds steady at 350°F.
Chateau Ste. Michelle Riesling Jelly
Jelly has been around since the 1500s. Your grandmother probably made it, so this is likely the only recipe on this list that Michael Pollan would consider. Wine jelly isn’t new, either; I’ve found dozens of recipes online, but they’re all terrible.
Here’s why: Almost all home jelly-making uses pectin as the gelling agent. Pectin is a heteropolysaccharide that occurs naturally in fruit and gives jellies their viscosity. But if you’ve ever tasted pectin, you know it’s horribly tart and metallic. To cover the flavor and assist in thickening, almost all recipes for fruit preserves call for ungodly amounts of sugar (think 4 cups sugar for 3 cups wine!). And you want me to add all that sugar to my lovely $7 bottle of riesling? No thank you.
Luckily, pectin isn’t the only gelling agent on the block. For this recipe, I chose agar-agar—yes, the stuff in petri dishes in 10th-grade biology class. But agar-agar (or just agar) is actually extracted from the cell walls of seaweed. It’s as colorless and tasteless as a Tea Party rally, and it’s much easier to work with than powdered gelatin. Plus, unlike gelatin, which is made from pig skin or cow parts, agar is vegan.
Just like 3-D hologram cell phones, the Japanese have been using agar since at least the mid-1800s. However, thanks to the rise of molecular gastronomy, agar is starting to become a popular choice for stateside chefs—it’s a convenient way to give texture and shape to liquids and desserts.
This is one of the simplest recipes you can make from agar; you can modify the same basic technique to add a gel-like texture to almost anything you can imagine. Chateau Ste. Michelle riesling, produced in Woodinville, is widely available, inexpensive, and pairs well with soft cheeses, smoked salmon, and any other noshes you might lay out before dinner. By transforming the wine into a firm gel, you can slice it, spread it, or smash it—and it will glisten like crystal.
Working time: 5 minutes
Total kitchen time: 1 hour
Makes: 1.5 cups
Shopping list:
• 2g agar-agar powder
• 1.5 cups Chateau Ste. Michelle riesling
• 2 tbsp. sugar
Special equipment: canning jar or molds (muffin pan, candy molds, or any other container for making jelly shapes)
1. Combine all ingredients in a medium saucepan. Stir to combine.
2. Bring the mixture to a boil, then remove from heat. Pour into a glass jar or individual molds.
3. Allow to cool one hour or until set.
These wine-jelly cubes make a great-tasting and great-looking accompaniment to a fruit-and-cheese plate. Or, if you’re old-school, just spread them on your morning toast.